
Adding an enrolment link to the I.T.S websites
Adding an enrolment link to the Main Website and the Enrolments Website.
Background Information: Intelligent Training Solutions operates four individual websites, linking them all together to create the impression of one website.
These four websites are:
- Main Website – This site contains the course information web pages, the home page, the online store, and any other information pages such as our services webpage etc…
- Enrolments Website – This site contains all our enrolment links, general online forms such as our enquires, our deferral forms etc…, enrolment URLs, and the ‘Enrol in a Course’ webpage.
- Staff Website – This site contains all documents, forms, policies and procedures, and general information relevant to I.T.S staff and contractors. This site also hosts the employee database.
- Learner Portal – This site is solely dedicated to Moodle.
Each website requires its own individual login by a staff member. Before proceeding to add an enrolment link/URL to the Intelligent Training Solutions websites, please ensure you have the authority and credentials required to access both the Main Website and the Enrolments Website.
Adding an enrolment link to the Enrolments Website
Logging In to the website
Navigate to the login webpage for the Enrolments Website. Visit: https://enrolments.its.edu.au/wp-admin/
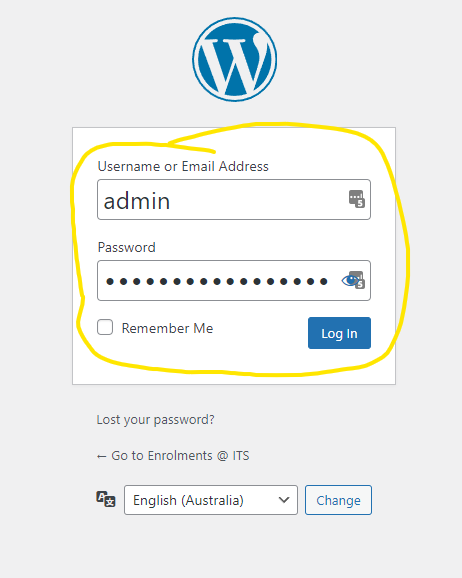
Enter your login credentials, then click the blue ‘Log In‘ button
Finding the required web pages.
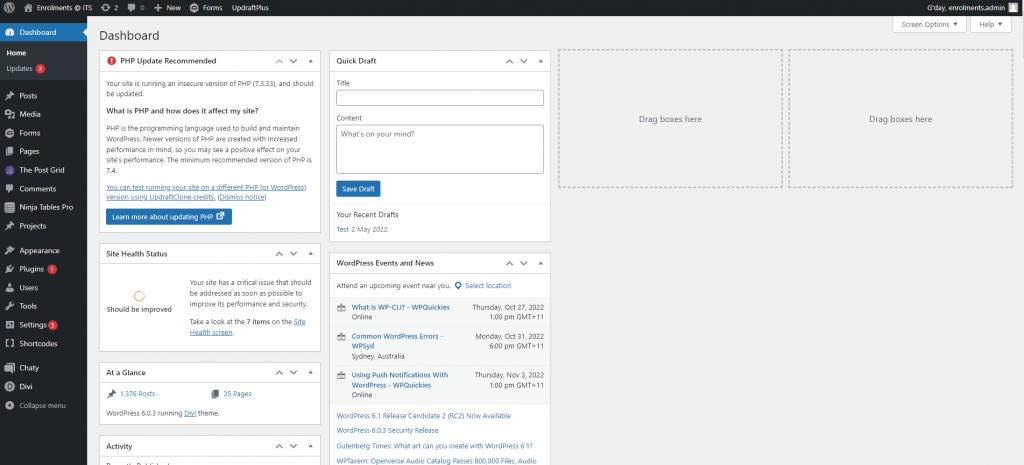
The quickest and easiest way to find the webpage and table you need to update would be to navigate the frontend of the website. To do this, click on the ‘Enrolments @ ITS‘ label (button) located at the top right-hand side of the web page. This will alter the display mode of the website from a dashboard view to a frontend end-user view.
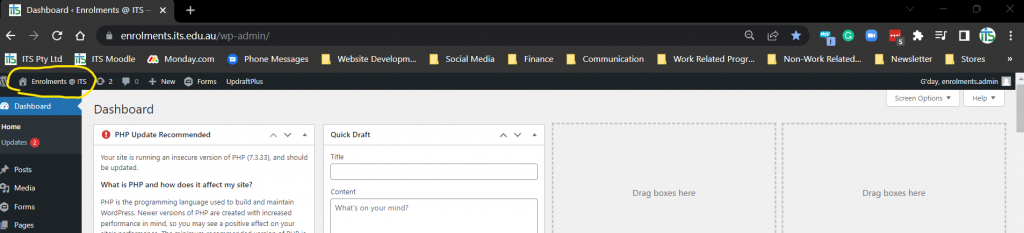
Example:
| Dashboard View | Frontend View |
 |
 |
Using the frontend view display mode, navigate the website as you normally would.
REMEMBER: If you click on another section of the website, such as the Home menu tab, you may be redirected off the Enrolments website. An easy way to know if you have left the Enrolment website would be by the URL address bar. The URL should start with enrolments.its.edu.au. If you have left the website you are working on, you may need to re-login.
Scroll through the web pages to find the course and table that requires updating. For example, if you are adding an HLTAID009 Provide Cardiopulmonary Resuscitation (CPR) course to our East Keilor training venue in the month of October, you would navigate through the site until you find the HLTAID009 Enrol Now page for October.
 |
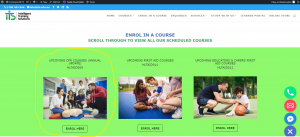 |
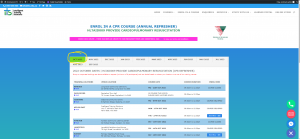 |
Editing a table within Ninja Tables Pro
WARNING! Each step beyond this point will alter the website in real time.
Please be extremely careful when making changes.
The tables used within a webpage are created from a program called Ninja Tables Pro. To edit a table you must first make sure that you have selected the correct month you wish to update/edit. After you have highlighted (selected) the correct month, scroll to the bottom of the table and right-click the blue link titled ‘Edit Table‘.
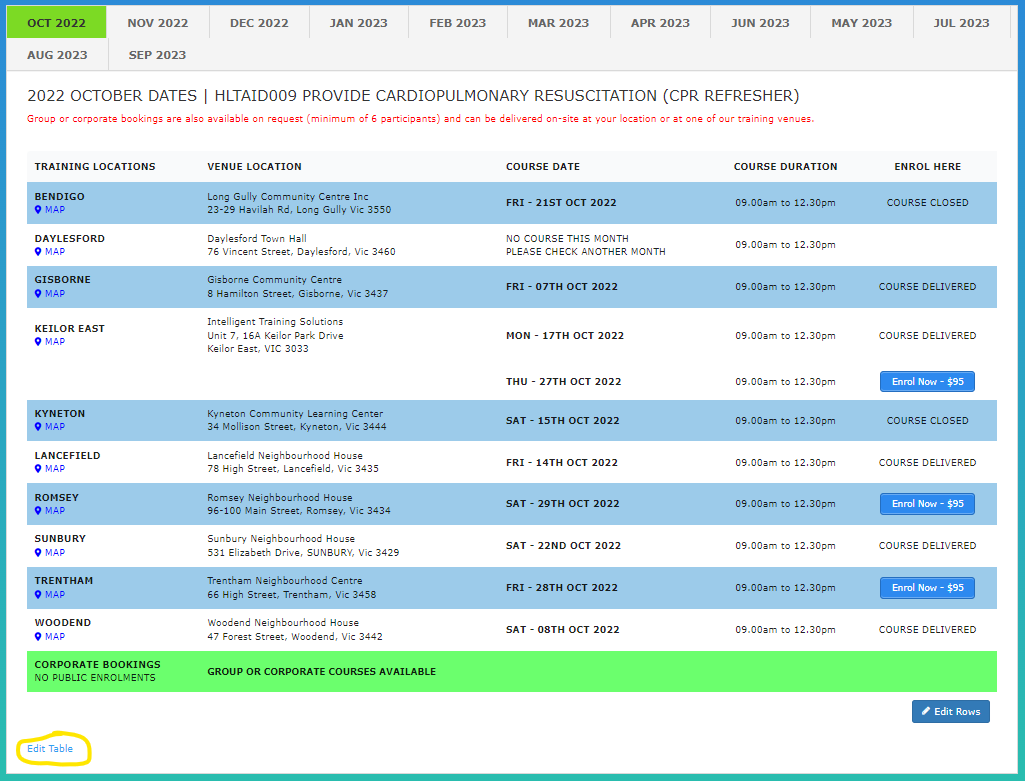
Right-clicking the edit table link will force the website to open another menu table for you. Click on the menu option ‘Open link in new tab‘. This will force the website to open Ninja Tables Pro and, within it, an editable version of the table in a new window within your browser.

Adding a new line within the table
If you are adding another course to the month, you will need to create a new line within the table for that course. To do this, select the ‘+‘ symbol next to the venue you are intending to add another course. For example, if you are adding a course to our East Keilor training venue, you would select the ‘+‘ symbol next to an already existing East Keilor course.
TIP: Selecting the ‘+‘ symbol will create a new line directly below. Be sure to keep the dates in order when adding a new course.
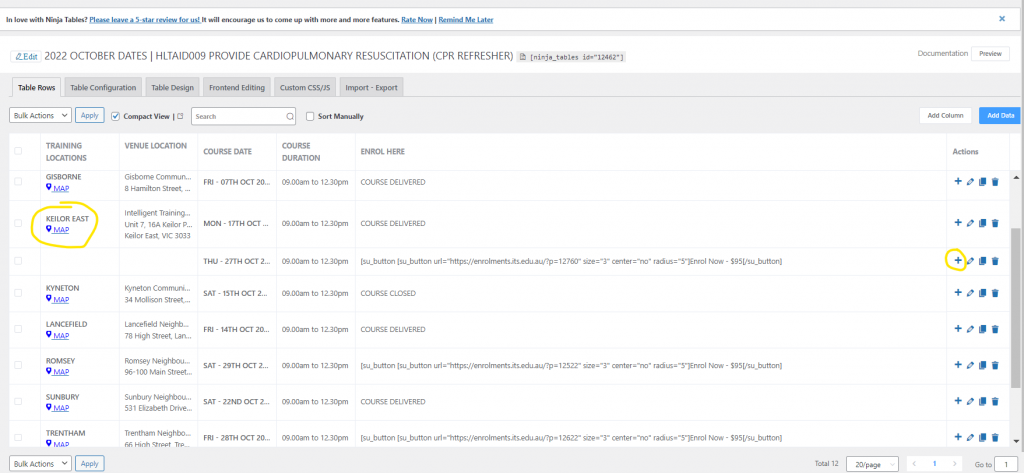
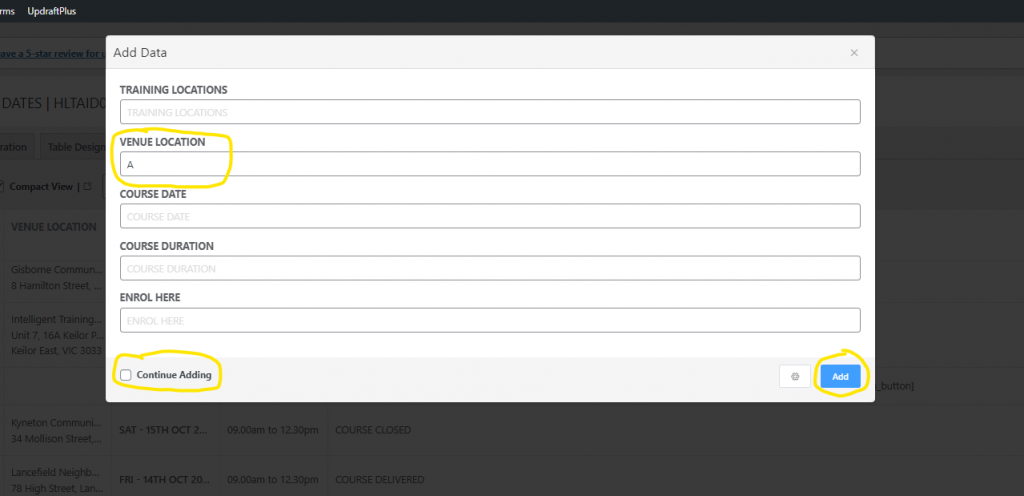
After clicking the ‘+‘ symbol, a pop window will appear on the screen. Add the letter ‘A‘ to the field titled ‘Venue Location‘, followed by unchecking (no tick) the checkbox titled ‘Continue Adding‘. Then click the blue ‘Add’ button.
NOTE: Adding the letter ‘A’ to the venue location will force the system to create the new line we need for the next step. Unchecking the checkbox ‘Continue Adding’ will ensure that the system does not keep adding unwanted lines to our table.
Now you should see a new line within your table.

Populating the new line with information
Delete the letter ‘A’ we placed in the table when it was created. Next, highlight the contents of the ‘Course Date‘ field from the course above. Press CTRL + C to copy the highlighted text.

Remaining in the Course Date column, click on the empty space within the new line you created, followed by CTRL + V. This will paste the text you just copied into the empty field. Amend the date within the text time, being careful not to remove or alter any of the code surrounding the date. Once you have edited the date, TAB or click out of that field. The system will automatically save your work!
EXAMPLE: <b>THU – 27TH OCT 2022</b> – Edit the section in bold leaving the <b> and </b> untouched.
Repeat this process for the Course Duration field, noting that this field may not need to be edited as the course start and end times for a public course generally do not change.
Finally, repeat the copy and paste process for the Enrol Here field. You will notice that the text within this field looks a bit different.
Example: Enrol Now – $95
Modifying the fields
After copying the text within the ‘Enrol Here’ field, you will need to alter the Enrolment Link ID, also known as the Post ID, together with the enrolment price. These sections are highlighted in red text in the above example.
Using the enrolment link you created in a previous step, copy the Post ID number from the enrolment URL, using that number, replace the Post ID from the code within the table. The post ID in the picture below is 14434.
You would change the code within the Enrol Here text field from this: Enrol Now – $95
To this: Enrol Now – $95
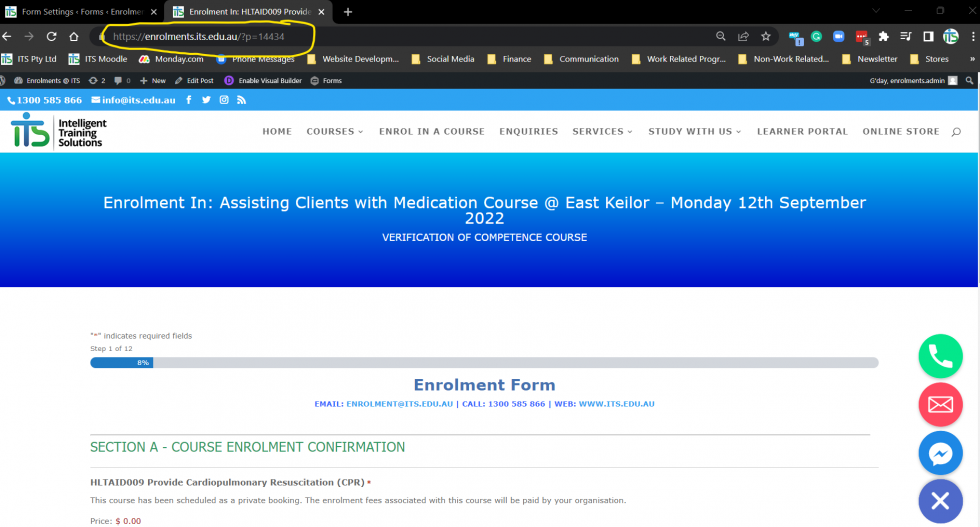
NOTE: If there is an enrolment fee price difference, you would also alter the price within that section of the code.
Next, TAB or click out of the Enrol Here field. This will force the system to save your work automatically. Returning to the original web browser containing the table, click the refresh button on the web browser to view your results. Once refreshed, you should see your new course appear on the Enrolments Website.
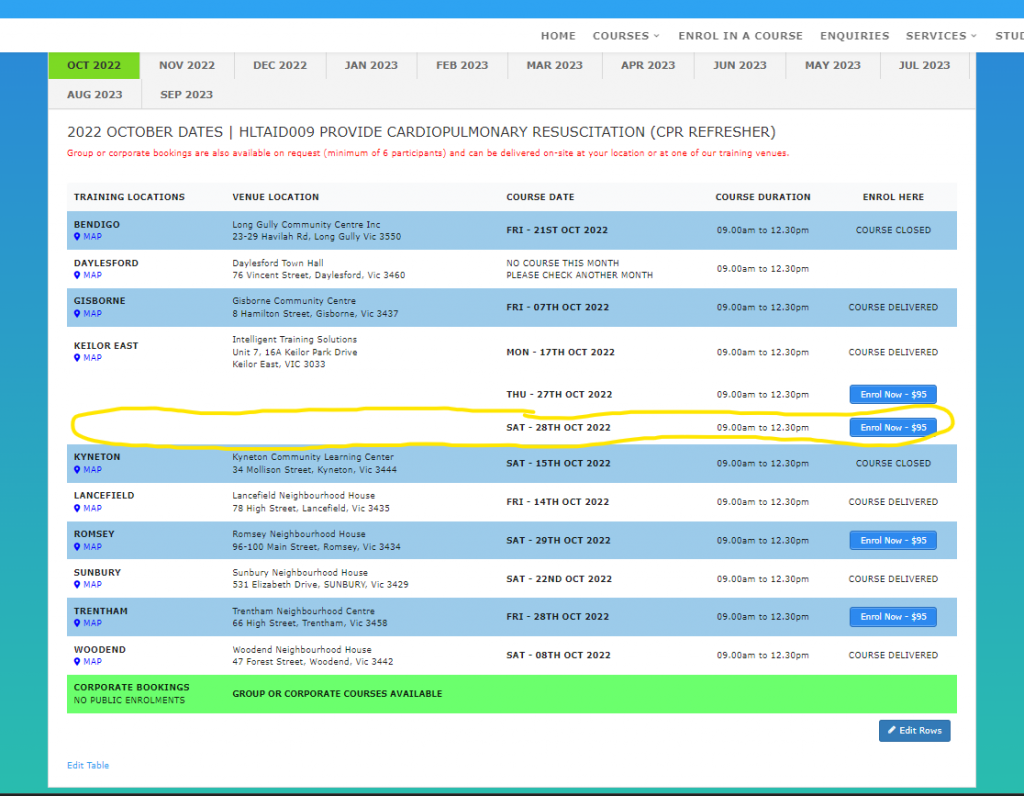
Final Steps
If all looks good with your newly added course, test the blue ‘Enrol Now‘ button to ensure that the link is working and that it will take you to the correct enrolment form.

Unforeseen Issues
If at any stage you are stuck or unsure of what to do, contact the system administrator or webmaster.
Adding an enrolment link to the Main Website
The process for updating the Main Websites course enrolment tables is identical to the steps listed above. The difference is that you will need to log in to the Main Website in order to make the necessary changes.
To log in to the Main Website, visit: https://www.its.vic.edu.au/wp-admin/